

Ransomware is arguably the most sinister malware out there. Unlike normal viruses, this malware runs silently in the background, encrypting your data so they can lock you out of it and hold the files for ransom. Major corporations–as well as hospitals–have caved to ransom demands and paid millions to hackers in hopes of recovering encrypted files. Fortunately, Microsoft has incorporated Ransomware protection into Windows 11.
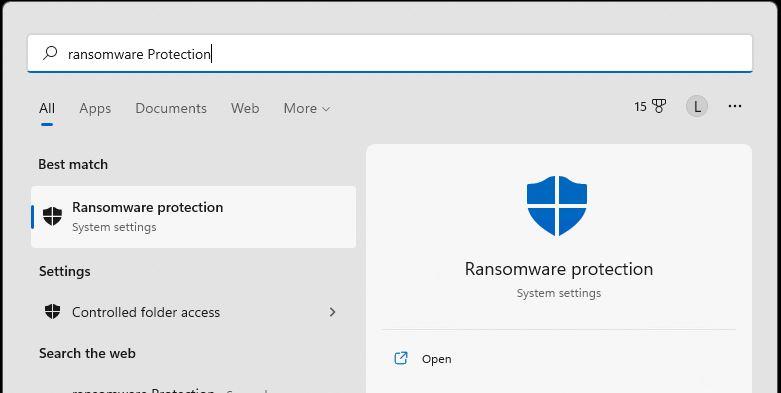
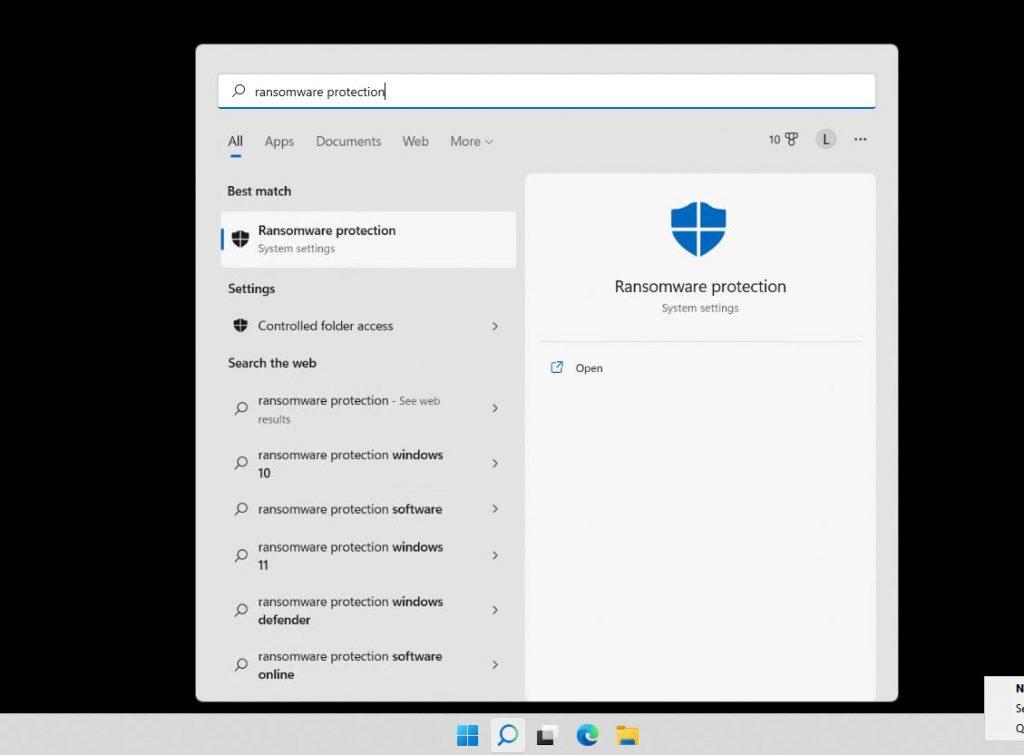
Navigate to the windows start button and type: Ransom Protection.
You should see Ransom protection as your best match.
Now click Ransom protection to open your system settings
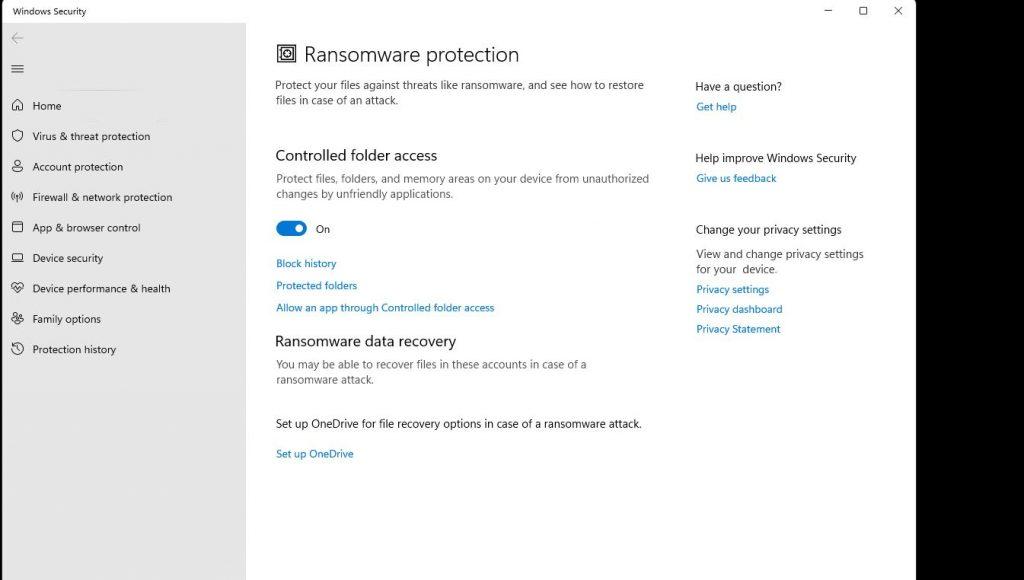
You may notice that the Ransomware protection is already enabled, which is great. If not, toggle the On switch as indicated in the screenshot below.
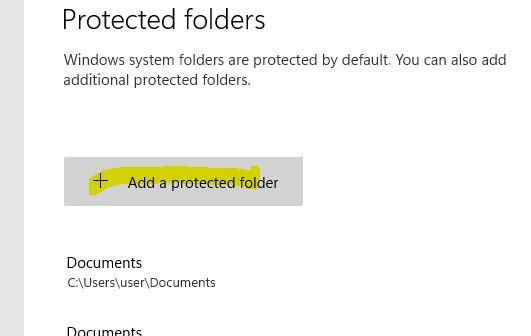
Only Windows system folders are protected by default. If you click the Protected folders link in the Ransomware protection section, you will notice that only the main folders under user profiles are protected. These include your Desktop, Documents, Pictures, Videos, and Favorites folders. This should be fine in most cases. But you have the ability to add additional folders.
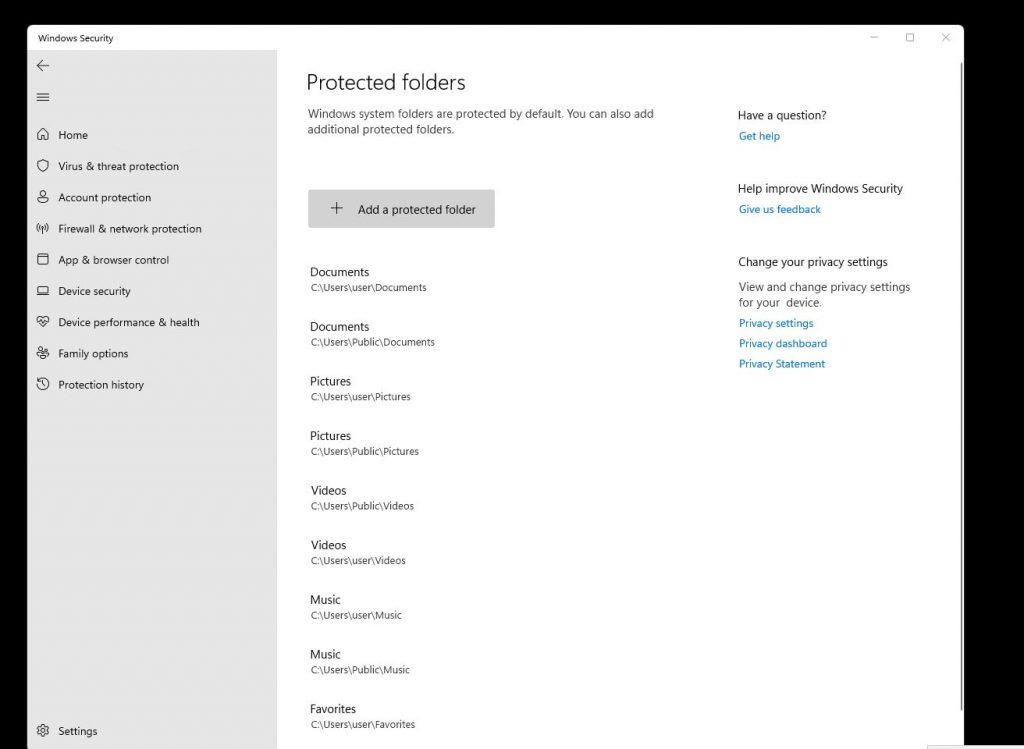
To add additional folders to the Windows 11 ransom protection click the + Add a protected folder button as seen below.
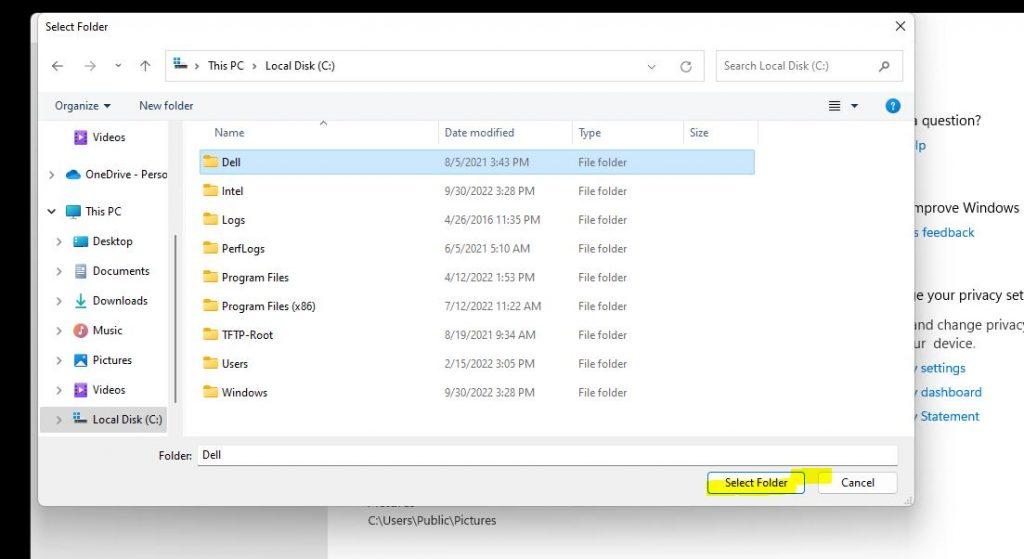
You will now be able to hit select folder to add additional folders to the Windows 11 ransom protection.
Windows 11 ransomware protection may not have the best defense but it is better than nothing and it is already built into Windows 11. Utilizing standard safety measures can minimize the likelihood that you will be exposed to malware that encrypts your data. Especially since most of the time when you notice you have Ransomware the damage is already done.